Ear mites are tiny parasites that can cause big problems for your cat. These pests, known scientifically as Otodectes cynotis, are common in cats, especially those who spend time outdoors or live in multi-pet households. If your cat is scratching its ears excessively, shaking its head, or has dark, crumbly discharge in its ears, ear mites might be the culprit.
While a vet visit is always the best course of action, some pet owners prefer to try at-home treatments first—either to save money or because their cat gets stressed at the vet. This guide will walk you through everything you need to know about ear mites in cats, including how to identify them, safe and effective DIY treatments, and when it’s time to call the vet.
By the end of this article, you’ll have a clear understanding of how to help your cat find relief from these irritating pests.
What Are Ear Mites?
Understanding the Parasite
Ear mites are microscopic parasites that live in the ear canals of cats (and sometimes dogs). They feed on ear wax and skin oils, causing intense itching and irritation. These mites are highly contagious and can spread quickly between pets.
Life Cycle of Ear Mites
Ear mites go through several stages:
Eggs – Laid in the ear canal, they hatch in about 4 days.
Larvae – Newly hatched mites start feeding immediately.
Nymphs – They molt into adults within a few weeks.
Adults – Mites live for about 2 months, continuously reproducing.
Because of their fast life cycle, an untreated infestation can quickly worsen.
Signs Your Cat Has Ear Mites
How can you tell if your cat has ear mites? Look for these common symptoms:
1. Excessive Scratching and Head Shaking
Cats with ear mites scratch their ears constantly. You may also notice them shaking their head frequently.
2. Dark, Crumbly Ear Discharge
Ear mites produce a dark, coffee-ground-like discharge. This is a mix of wax, blood, and mite waste.
3. Redness and Inflammation
The ears may look red and irritated due to constant scratching.
4. Hair Loss Around the Ears
Some cats scratch so much that they lose fur near their ears.
5. Strong Odor
A foul smell from the ears can indicate an infection caused by mites.
If you see these signs, it’s time to take action.
How to Confirm Ear Mites at Home
Before treating your cat, you should confirm that ear mites are the problem. Here’s how:
1. Check the Ear Discharge
Take a cotton ball or swab and gently collect some ear debris. Place it on a dark surface—live mites may appear as tiny white specks moving slowly.
2. Use a Magnifying Glass or Flashlight
If you shine a light into the ear, you might see mites crawling.
3. The “Paper Test”
Place some ear debris on a white paper towel. Add a few drops of hydrogen peroxide—if you see bubbling, it’s likely mite-related debris.
If you’re still unsure, a vet can examine a sample under a microscope for a definitive diagnosis.
Safe and Effective DIY Ear Mite Treatments
If you’ve confirmed ear mites, here are some at-home treatments you can try.
1. Mineral Oil Treatment
Mineral oil is a safe, natural way to smother ear mites.
Steps:
- Warm the oil slightly (test on your wrist to ensure it’s not too hot).
- Use a dropper to put a few drops in your cat’s ear.
- Massage the base of the ear gently.
- Wipe away debris with a cotton ball.
- Repeat daily for 7-10 days.
2. Apple Cider Vinegar Solution
Apple cider vinegar creates an acidic environment that mites dislike.
Steps:
- Mix equal parts apple cider vinegar and water.
- Apply a few drops into the ear.
- Massage gently.
- Clean with a cotton ball.
- Repeat every other day for 2 weeks.
Note: Do not use if the ears are raw or bleeding.
3. Coconut Oil
Coconut oil has natural antifungal and antibacterial properties.
Steps:
- Warm a small amount of coconut oil.
- Apply a few drops into the ear.
- Massage and clean as above.
- Repeat daily for 1-2 weeks.
4. Over-the-Counter Ear Mite Medications
Products like Revolution or Advantage Multi can treat ear mites. Follow the instructions carefully.
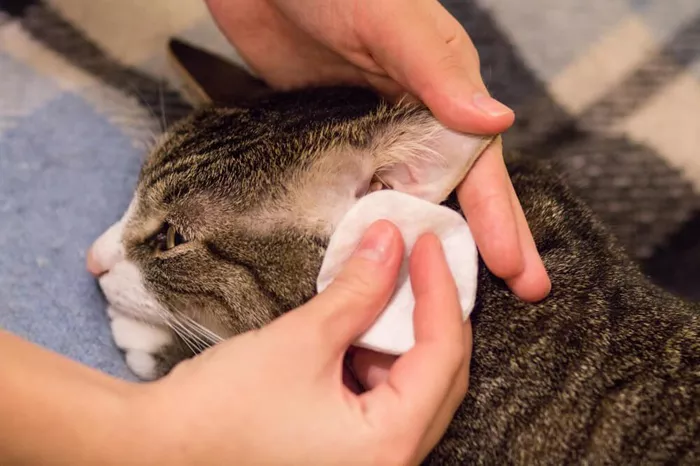
Cleaning Your Cat’s Ears Properly
Cleaning is crucial for removing mites and debris. Here’s how to do it safely:
Supplies Needed:
- Cotton balls or gauze
- Ear cleaner (or homemade solution)
- Towel (to restrain your cat if needed)
Steps:
Restrain Your Cat Gently – Wrap them in a towel if they’re squirmy.
Apply Cleaner – Fill the ear canal (but don’t push deep).
Massage the Base – Helps loosen debris.
Let Your Cat Shake – This brings debris to the surface.
Wipe Away Discharge – Use cotton balls to clean.
Never use Q-tips deep in the ear—this can cause injury.
Preventing Future Ear Mite Infestations
Once you’ve treated the mites, keep them from coming back with these tips:
1. Treat All Pets in the Household
If one pet has mites, others likely do too. Treat them all at the same time.
2. Wash Bedding and Toys
Mites can live in fabric, so wash everything in hot water.
3. Regular Ear Checks
Inspect your cat’s ears weekly for early signs of mites.
4. Use Preventative Medications
Monthly flea treatments like Revolution also prevent ear mites.
When to See a Vet
While DIY treatments can work, some cases need professional help. Call your vet if:
- The symptoms don’t improve after 2 weeks.
- Your cat’s ears are bleeding or very swollen.
- You suspect a secondary infection (yellow/green discharge).
- Your cat seems in pain or stops eating.
A vet can prescribe stronger medications if needed.
Conclusion
Ear mites are annoying but treatable. With the right approach, you can help your cat find relief at home. Start by confirming the mites, then use safe treatments like mineral oil or coconut oil. Clean the ears regularly and take steps to prevent reinfestation.
If home remedies don’t work, don’t hesitate to visit the vet. Your cat’s comfort and health should always come first.
By following this guide, you’ll be well-equipped to handle ear mites and keep your feline friend happy and itch-free!
Related Topic:


